Wondering how to accept credit card payments on your website without building an entire online store? You’re not alone. For freelancers, consultants, and service businesses, a full storefront is overkill: you just need to invoice a client, take a deposit, or sell one service.
The good news is that you can do all of that with a simple payment form. No shopping cart, no product catalog, no complicated store setup. All it takes is a free Stripe account, your existing WordPress site, and a payment form plugin to connect the two.
In this guide, we’ll explain how online card payments work in plain terms, what they really cost (with actual numbers), and how to set up, test, and launch a payment form on your site.
Let’s get started!
How do online credit card payments work? 🔍
Every online card payment involves three players: your website, a payment gateway, and a payment processor. A payment gateway is the secure messenger that captures your customer’s card details and delivers them to the companies moving the money. The payment processor does the actual moving: it checks with the customer’s bank, gets the approval, and transfers the funds to your account.
That sounds like a lot of moving parts, and it used to be. Today, services like Stripe bundle the whole payment stack into one account with no setup or monthly fees. You never handle card numbers yourself. With the setup in this guide, card details travel directly from your customer’s browser to Stripe, which is certified at the payment industry’s strictest security level (PCI Level 1). Your WordPress server never touches sensitive data.
Why bother at all? Because paying by card is what your clients expect. Asking a customer to mail a check or figure out a bank transfer adds friction at exactly the wrong moment, right when they’re ready to pay you. A card form on your site removes that friction, and the money arrives in your bank account as a Stripe payout.
So to accept credit card payments on your website, you need exactly three things:
- A Stripe account: free to create, with no setup fees and no monthly fees.
- A WordPress website: the site you already have is fine. If it isn’t live yet, get that sorted first and come back.
- A payment form plugin: the tool that adds the actual payment form to your pages. More on that below.
From your customer’s side, the experience is simple: they open your payment page, type in their card details, hit pay, and get a receipt. Stripe supports payments in over 100 currencies, plus wallets like Apple Pay and Google Pay, so your clients can pay the way they prefer.
What does it cost to accept credit card payments? 💸
Let’s talk money first, because “free payment processing” doesn’t exist. There are two separate fees in this stack, and you should know both upfront.
- Stripe’s processing fee: this applies to every transaction, no matter which tools you use. On Stripe’s US pricing, it’s 2.9% + 30¢ per successful transaction for domestic cards, plus an extra 1.5% for international cards and another 1% if currency conversion is required [1]. There are no setup, monthly, or hidden fees. On a $100 payment from a US card, Stripe keeps $3.20.
- WP Full Pay‘s platform fee: the plugin’s free version charges 5% per transaction, on top of Stripe’s rate [2]. A paid license removes that 5% entirely. The Basic license costs $79.50 per year for one site (discounted from its $159 list price) and includes a year of updates and support [3].
💡 Stripe’s rates are country-dependent. The figures above come from Stripe’s US pricing page, so check the pricing for your own country before you budget.
So which is cheaper, the 5% fee or the license? The math is refreshingly simple. Five percent of $1,590 is exactly $79.50, which makes $1,590 in yearly card volume your break-even point. Process less than that (about $132 per month) and the free version is the cheaper route. Process more and the license pays for itself.
A concrete example: sixteen $100 payments over a year rack up $80 in platform fees on the free tier, already more than the $79.50 license. Stripe’s $3.20 per $100 applies either way, so it cancels out of the comparison.
⚠️ NOTE: Be skeptical of any tool advertising “free” card payments. Card networks always charge to move money, so a supposedly free service is either adding its own markup or charging you somewhere else. The honest question is never whether you’ll pay fees, but which ones.
How to accept credit card payments on your website ⚙️
Time to build. We’ll use WP Full Pay as the example plugin, since it’s purpose-built for exactly this job: standalone Stripe payment forms with no store required. Full disclosure: WP Full Pay is part of the ThemeIsle family, the same team behind DomainWheel. The general steps apply to any Stripe form plugin, but the screens will differ.
The same plugin also handles subscriptions and donations, but this guide focuses on the one-off payment form you’ll use for invoices, deposits, and single services.
Step 1: Create a free Stripe account 🧾
Head to stripe.com and sign up. There’s nothing to pay to open the account itself, and you can connect your bank details during setup.
Step 2: Install the WP Full Pay plugin 🔌
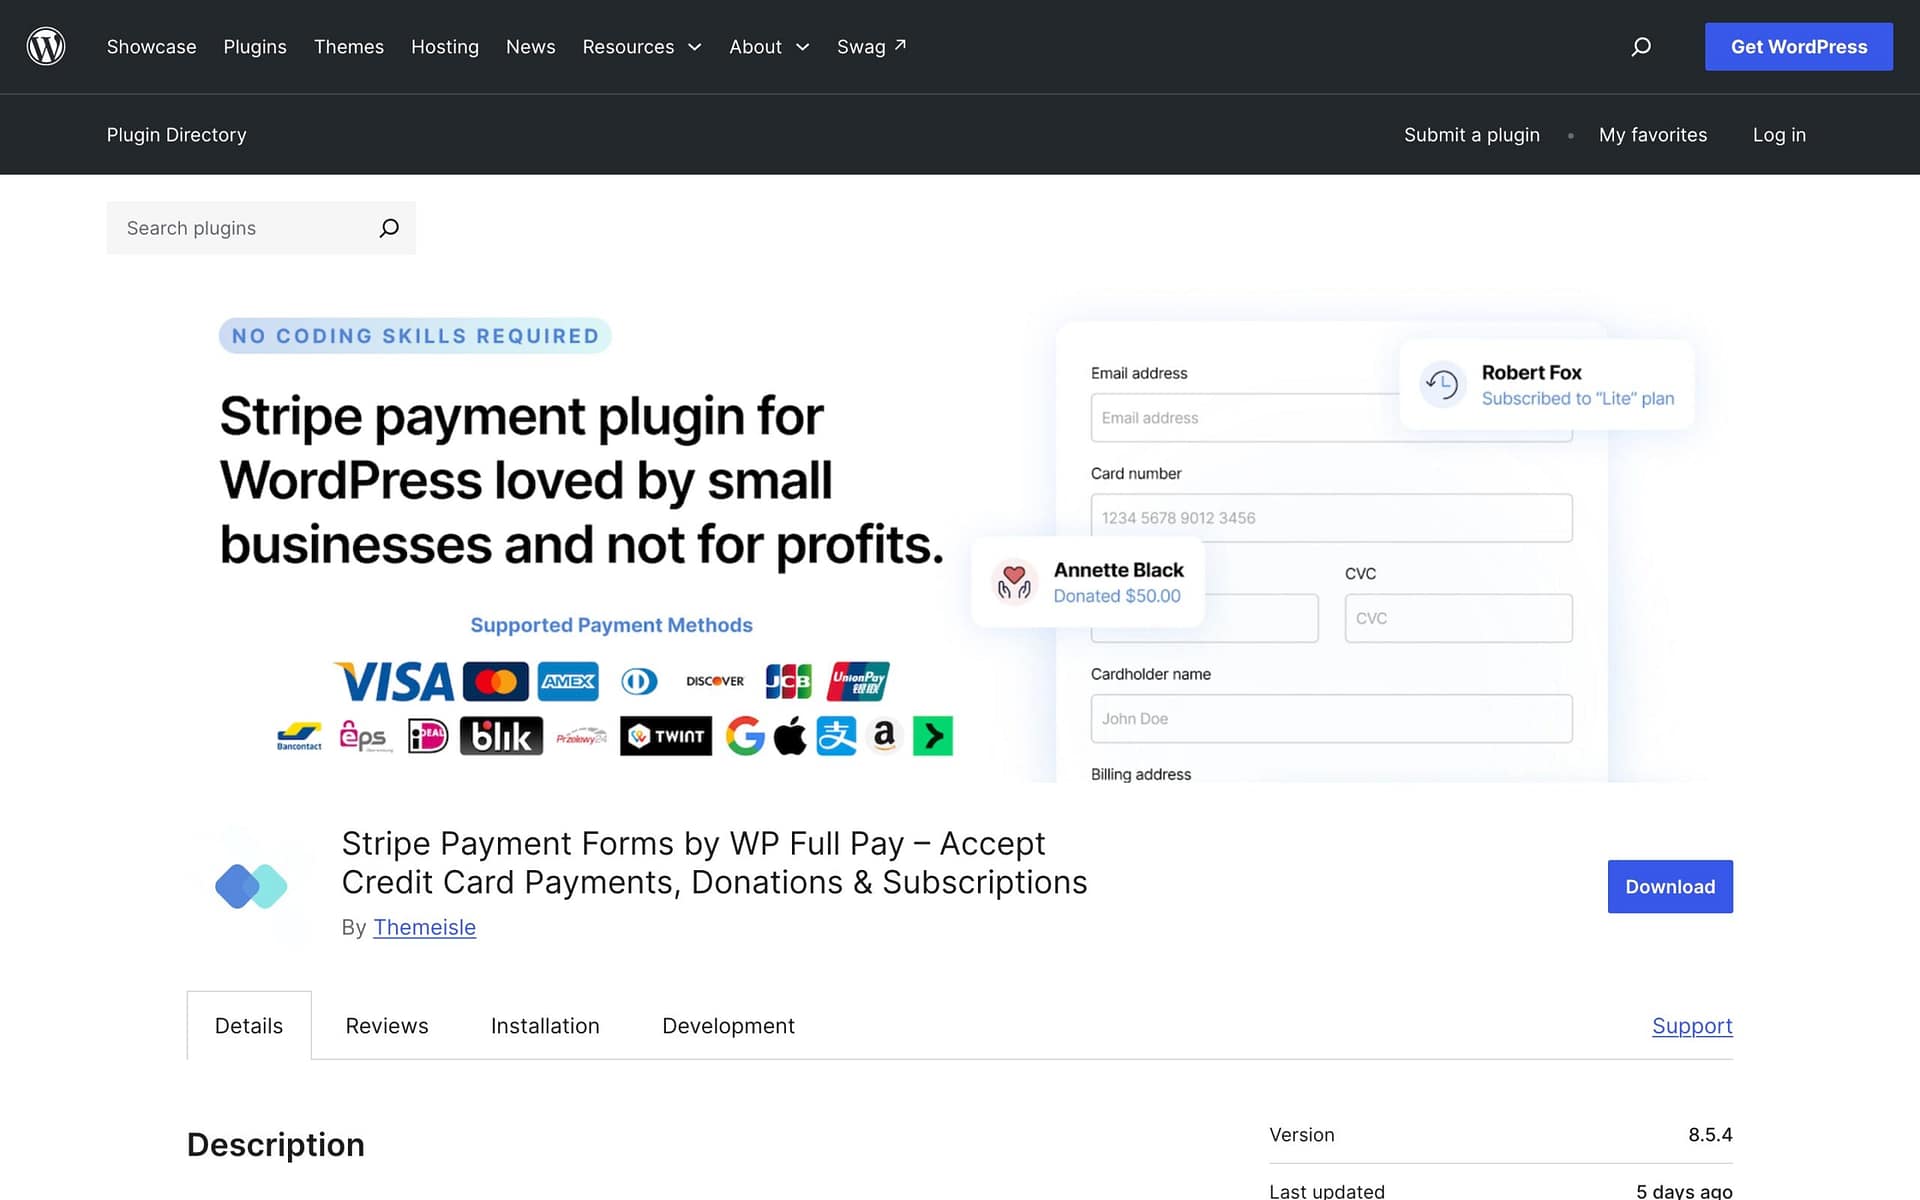
Log into your WordPress dashboard, search for WP Full Pay in the plugin directory, then install and activate it. The free version includes every feature; the 5% per-transaction fee is how it pays for itself until you buy a license. It’s a standalone plugin, not a WooCommerce add-on, so there’s no store to configure.
Step 3: Connect to Stripe in test mode 🔗
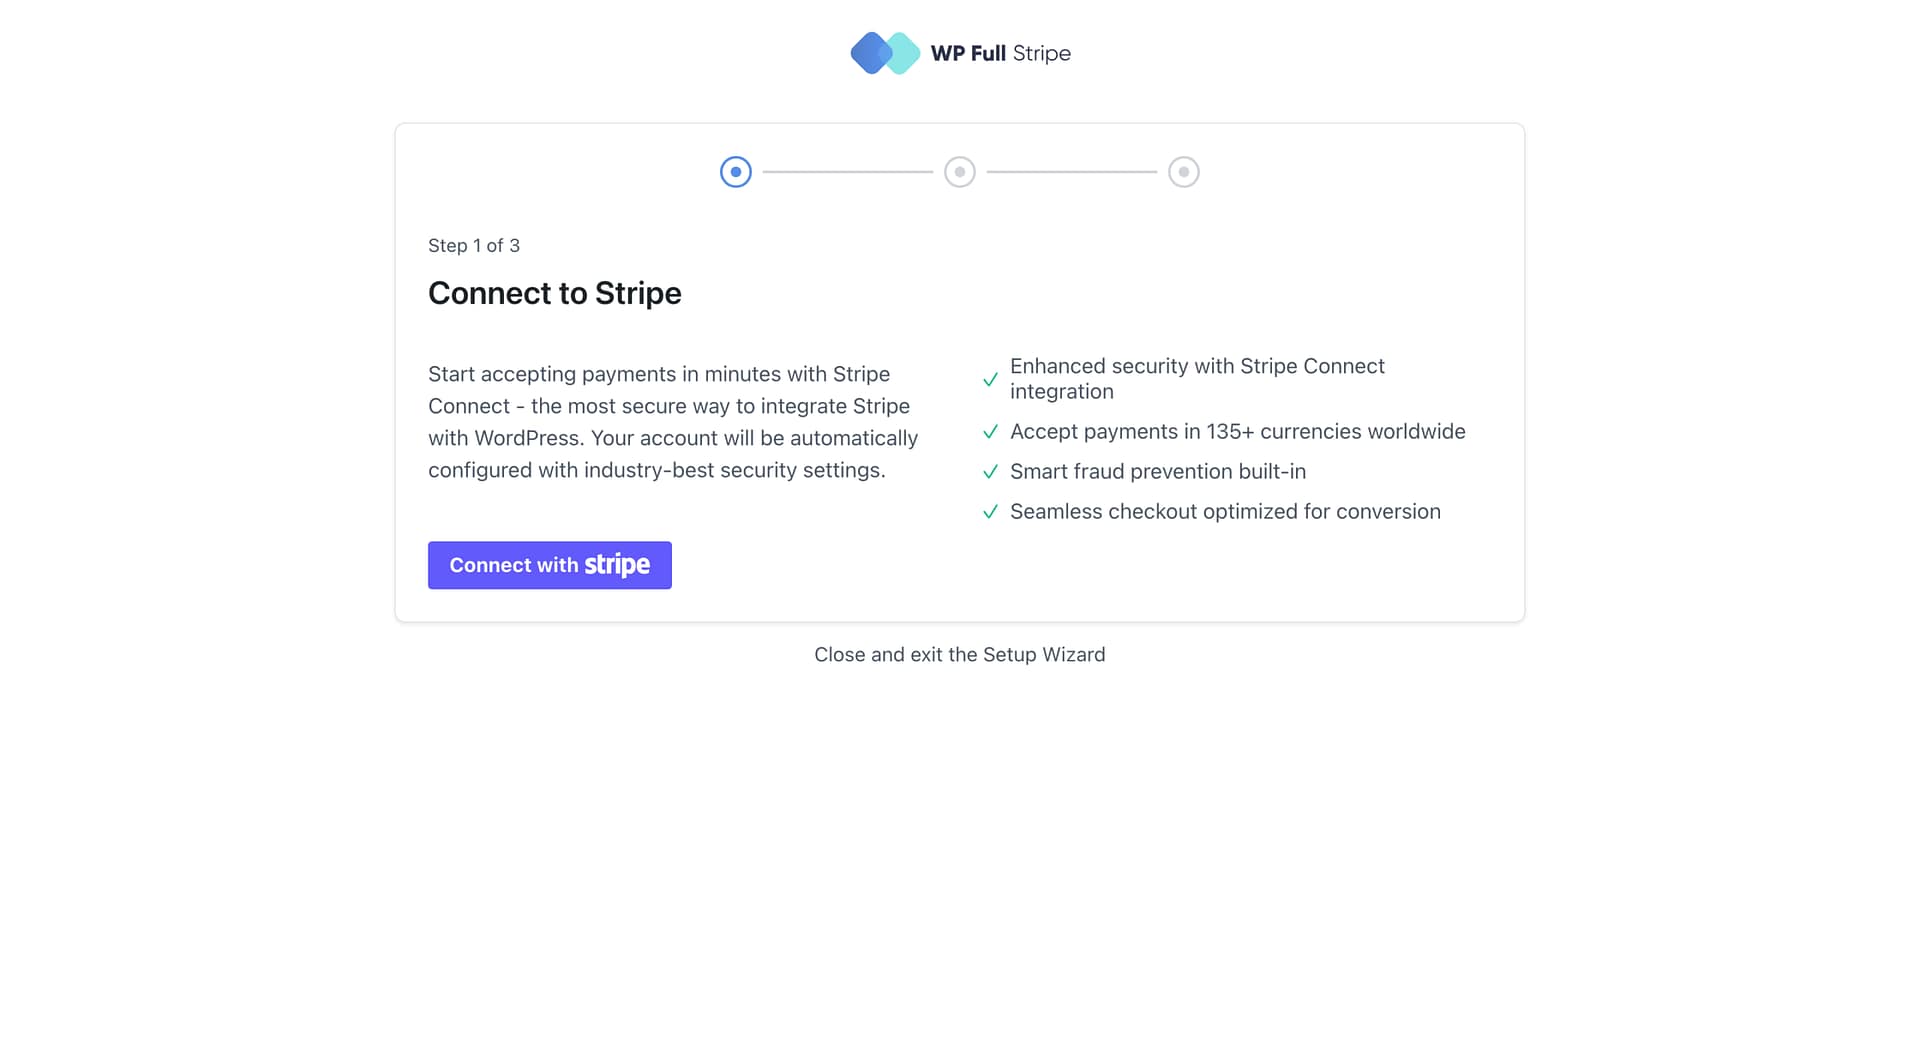
Once activated, a new Full Pay menu appears in your dashboard. Open its settings and connect your Stripe account through the guided Stripe Connect flow, which can link the account you just created in a few clicks. Run the connection in test mode first. Test mode simulates payments without moving real money, and the plugin reminds you it’s on with a test mode badge in the admin bar.
Step 4: Build your payment form 🛠️
Create a new form from the Full Pay menu and pick the one-off payment type. Give the form a name, choose your currency, and set the amount in the form settings: a fixed price for your service, or whatever invoice total you quoted the client. You can also choose which fields to display and have Stripe send the receipt email automatically.
Keep the form short. Every extra field is one more chance for a customer to abandon the payment halfway, and your invoice already has their details. A name, an email address, and a card field are usually enough.
When the form looks right, embed it on any page or post using its shortcode or the Form by WP Full Pay block in the WordPress editor. A dedicated payment page linked from your invoice emails works beautifully here.
Step 5: Run a test payment 🧪
Before you send the form to anyone, prove that it works. With test mode on, open the page where you embedded the form and make a payment using Stripe’s test card number 4242 4242 4242 4242, with any future expiry date, any three-digit CVC, and any postal code [4].
The payment should succeed and show up in your Stripe dashboard’s test data. If it does, your whole pipeline works: form, connection, and account. One ground rule from Stripe: never test in live mode with real card details.
Step 6: Go live 🚀
Happy with the test? Switch the plugin from test mode to live mode and run the live connection flow. Your form now accepts real cards, and you’re officially open for business. If you enabled the option in your form settings, Stripe emails receipts to your customers automatically.
👉 Watch your Stripe dashboard when the first real payment arrives: you’ll see it land there.
When you actually need an online store 🛒
Payment forms shine when you sell your time or a handful of services: invoices, deposits, retainers, one-off projects. They hit a wall quickly if you need a product catalog, size or color variations, inventory tracking, shipping calculations, or a cart full of items.
If that sounds like you, what you actually need is a proper online store built with something like WooCommerce. WP Full Pay isn’t a WooCommerce add-on, although the two can run side by side if you ever need both. You can also start with a payment form and graduate to a store later; nothing you build here goes to waste. To compare the full store setup before committing, check out our guide on how to create an online store.
Final thoughts 🏁
Accepting credit card payments on your website comes down to three pieces: a Stripe account to process the money, a payment form plugin to collect it, and a test payment to prove everything works before real money is involved. No store required.
For most freelancers and service businesses, the smart route is to start on WP Full Pay’s free version and upgrade to the Basic license once you’re processing more than about $1,590 per year. The math makes the decision for you.
Once the payments are flowing, the next challenge is winning more clients to pay you. For the marketing side of the equation, read our guide to selling services online.